

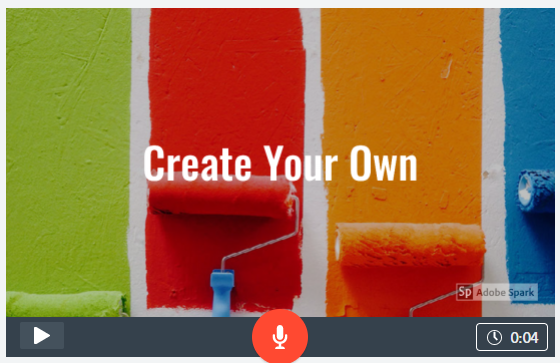
How To Create An Animated Youtube Intro
Creating an animated YouTube intro is actually easier than you might think. You don't need to pay a professional to create an elaborate intro for your videos and there are even ways to create them without paying for expensive editing softwares. Follow our complete guide here on five methods to create your own animated YouTube intro.
1. Creating an Intro with Canva
You might have known that Canva.com is an excellent free tool to help you create social media graphics. Did you know this tool can also be used to help you create your animation for free? Let's explore how to do it. Note: These steps can also be completed on the Canva mobile app, but the position of the buttons might be located in different places.
Step 1. Navigate to Canva's Website. If you don't already have a free account go ahead and create one before going to the next step.
Step 2. Type YouTube into the search box.
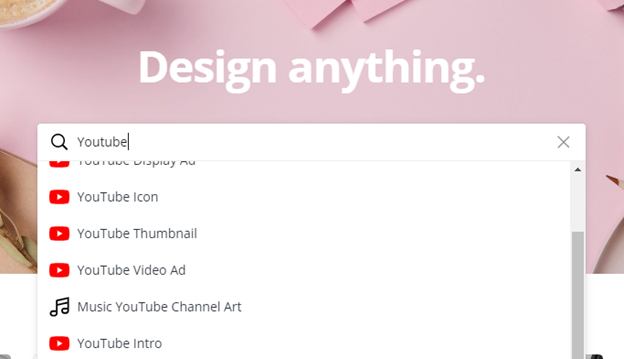
Step 3. Select one of the Youtube options. Any of them will help you have the correct dimensions needed. For now, select Youtube Thumbnail.
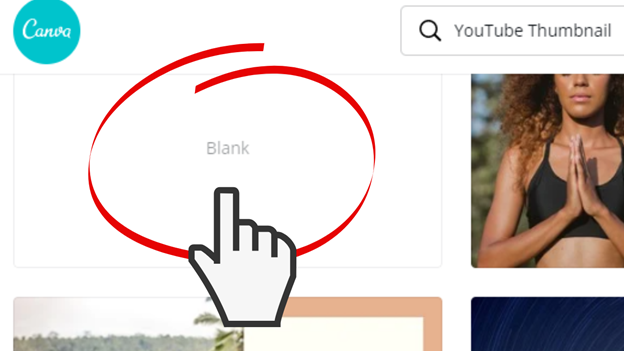
Step 4. From here you can select a template or simply choose the blank option to start from scratch. For this tutorial let's select the blank option.
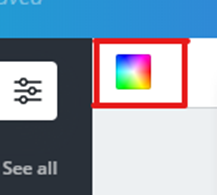
Step 5. Now click on the color palette icon to choose which colored background you want. You can select one of the default colors or select new color to manually select the color you want.
Step 6. Upload your logo. If you would like to include your logo, then select the uploads button on the left. Locate your logo. Once it's uploaded, click on the thumbnail of your newly uploaded logo to have it brought into your into.
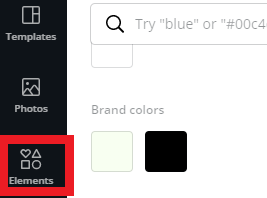
Step 7. Select the Elements icon in the left-hand column.
Step 8. Scroll down to stickers. These are animated gifs you can use to help make your intro. You can use as many as you want.
Step 9. After you have the stickers that you want, select the text button, and add the title of your channel or the title of your episode.
Step 10. Select the add new page button at the bottom of the page. Pages are neat in Canva. It's similar to moving to a new cut scene within a video editor. Note: You can also duplicate the page instead of adding new. This will keep all the elements of the original page which is helpful if you want to keep your logo through the next transition.

Step 11. You can now change the background color if you would like or mix up your stickers and text.
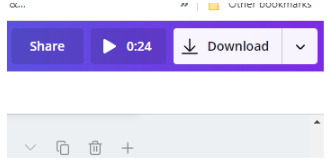
Step 12. Review your video by selecting the play button located to the left of the download button.
Step 13. Continue to make updates until you are ready to publish.
Step 14. Finally, select the download button to download your intro.
2. Creating an Intro with Keynote (Mac)
Mac users appreciate the free applications that are included with the system. Programs like Keynote or iMovie have made it easy to make great looking projects without having to invest in new software. Here's our guide to creating a youtube animated intro with Keynote.
Step 1. Gather any image elements you would like to use in your intro like your logo or social media icons you would like to include.
Step 2. Open the keynote applications.
Step 3. Create a new presentation.
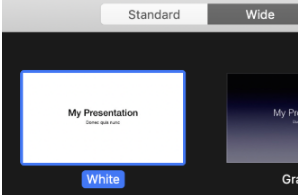
Step 4. Select the wide format at the top of the program window. The default is standard.
Step 5. Choose a template. For this tutorial, we will be selecting the blank template.
Step 6. Next, import your images onto the canvas by selecting the media button at the top.
Step 7. Scroll down to choose, then locate the logo or any images you want to include on your keynote canvas.
Step 8. Adjust the size of the icons to the size you want. You should also move the images around until you get them in a layout you like. Note: It is generally a good idea to include a youtube subscribe button as a visual cue to get viewers to subscribe.
Step 9. Select an image or element you want to animate.
Step 10. Locate the animate tab in the top right.
Step 11. Select add an effect.
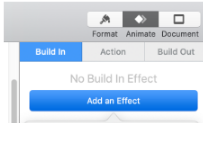
Step 10. Add an effect to each image. Note: You can preview the animation before adding it by hovering over the selection.
Step 11. Preview your project as a slide show to see how it appears all together. This would be a great opportunity to adjust the components if they aren't working well together.
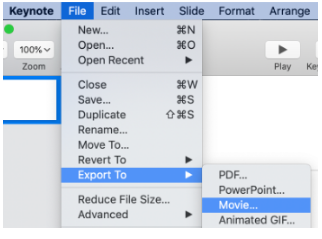
Step 12. Lastly, export your project to get it added to your Youtube video. iMovie is a great application within any Mac that can help you finish your project and add the intro to your video. Note: You will need to adjust your resolution to 1080p. The default resolution is 720p.
3. Creating an animated Intro with Powerpoint:
Step 1. Open up the Powerpoint application.
Step 2. Select a blank presentation.
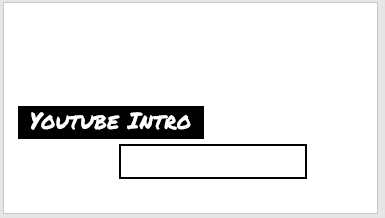
Step 3. Enter some text that you want to be included in your intro slide near the middle of the slide.
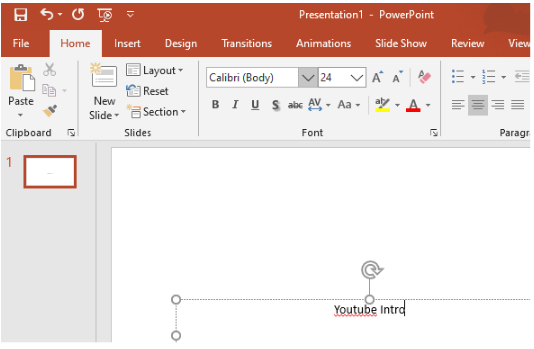
Step 4. Choose a font and font size for what you just typed. For this tutorial, we are using a font called permanent marker and size 66.

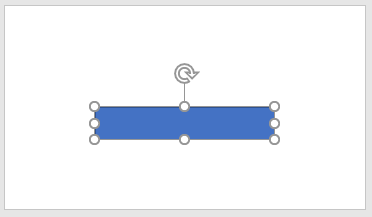
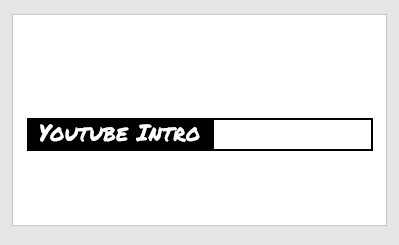
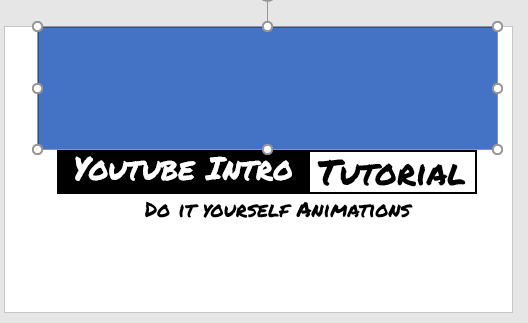
Step 6. Place the rectangle shape over the text.
Step 7. Select the rectangle and select the arrange tab located next to shapes.
Step 8. Select the send to back arrangement.
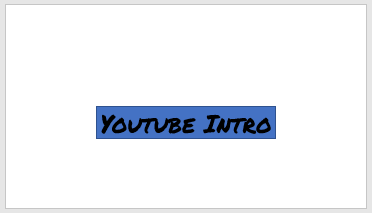
Step 9. Change the color of your text to white. Note: The text should be at the center of your rectangle prior to changing the color so it's not lost in the background.
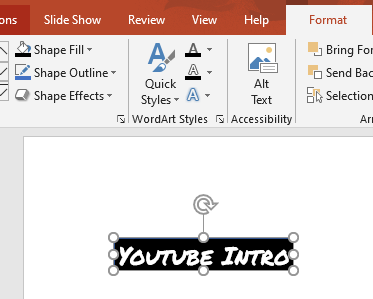
Step 10. Select your rectangle and click on the Format tab at the top.
Step 11. Click on Shape Fill and change the color of the rectangle to black.
Step 12. Click on Shape Outline and select no outline.
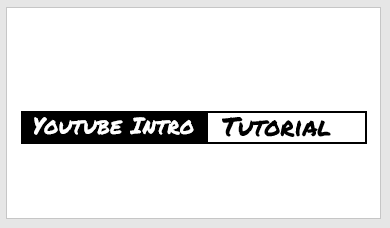
Step 13. Copy the black rectangle so you have two of them. Ctrl + C, then Ctrl+v to add it to your slide. Or you can right-click on the rectangle and then right-click paste.
Step 14. Move the new rectangle where you can see it and it's not covering up your text.
Step 15. Format your new rectangle and this time choose Shape Fill no fill.
Step 16. Next, go to Shape Outline and select black.
Step 17. Go back to Shape Outline and this time go to the weight option. Select weight 4 ½ for the outline.
Step 18. Move the rectangle so it is adjacent to the original rectangle.
Step 19. Zoom in using the zoom slider at the bottom right side of the Powerpoint program. And shrink the rectangle so it perfectly matches the height of your original rectangle. Note: I also had to shrink the length of my rectangle to fit in the slide.
Step 20. Now copy your text and paste it onto the slide. Change the font color this time to black. Note: This text should be the same font and size as your original text.
Step 21. Move the new text into the outlined rectangle and shrink the size of the outlined rectangle so you don't have a lot of extra white space.
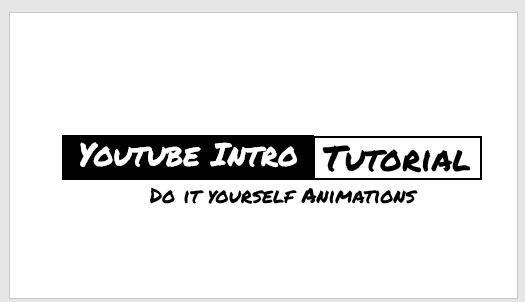
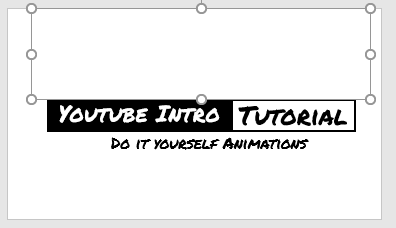
Step 22. This step is optional. If you would like to also include a subtitle, then copy your newest black text and add a subtitle. Shrink the text size and add it below the rectangles.
Step 23. Use Ctrl+A to highlight everything on your slide and make sure it's centered on your slide.
Step 24. Add a new rectangle stretching from the top of your current rectangles to the top of the slide. We are going to use this to help hide your text flying in later.
Step 25. Change the color to white to match the background. Do this by going to Shape Fill and selecting the white color. Then go to Shape Outline and select no outline.
Step 26. Repeat these steps until you have a white rectangle to the left of your black rectangle and one below the subtitle. Again this is to mask the entrance of you text when we animate it.
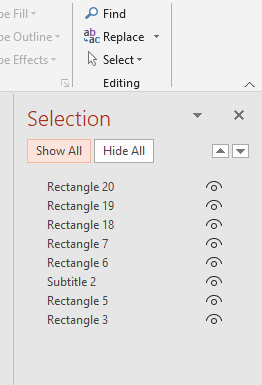
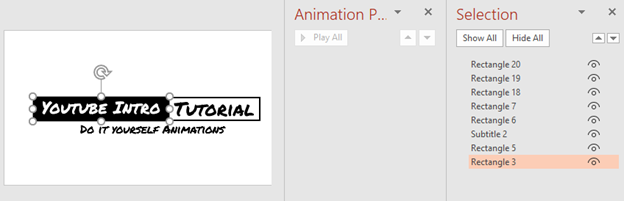
Step 27. Open the select panel. This is found in the upper right-hand portion of the Powerpoint program. It has a pointer icon next to the word select. This will make it easier to select the different elements in the slide.
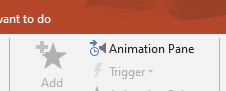
Step 28. Now we want to open the animation panel. Select the animation tab and then choose Animation Pane.
Step 29. In the selection panel, select the black rectangle. It will highlight within the slide.
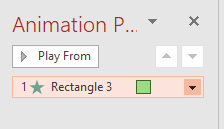
Step 30. Select the fly-in animation option in the animation tab.
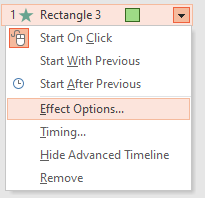
Step 31. From the animation pane, select the drop-down arrow next to your newly added animation.
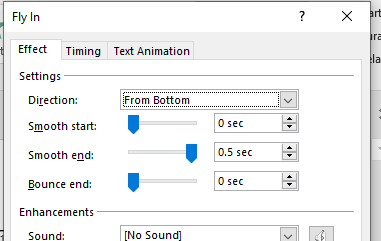
Step 32. Go to Effect Options.
Step 33. Select direction From Left and move the Smooth end slider all the way to the right. Select OK.
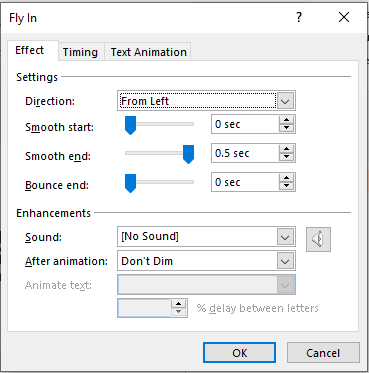
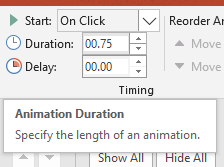
Step 34. Change the duration to 00.75.
Step 35. In the selection pane, select the rectangle outline that contains your 2nd text box. Once you have the correct rectangle, choose the fly-in animation for this one as well.
Step 36. From the animation pane, select the drop-down arrow next to your newly added animation. Go to Effect Options. Select direction From Left and move the Smooth end slider all the way to the right. Select OK.
Step 37. In the Start drop-down change it to start With Previous.
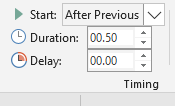
Step 38. Make the Duration 00.75 and the Delay to 00.50.
Step 39. From the selection pane, select the text in the black rectangle. Add the fly-in animation from this text box. Open the effect options and choose from the top. Drag the Smooth end slider all the way to the right.
Step 40. Change the start timer to start After Previous.
Step 41. Select the text in the outlined rectangle and repeat all the same steps for the previous text in step 39.
Step 42. Change the start timer for this text box to start With Previous.
Step 43. Select the subtitle text. And add a fly-in animation.
Step 44. Update the effect options and make the direction From Bottom.
Step 45. Move the Smooth end slider all the way to the right and select OK.
Step 46. Set the start timer for this to start After Previous.
Step 47. The animation should now be complete. You can choose slide show and from beginning to preview the animation.
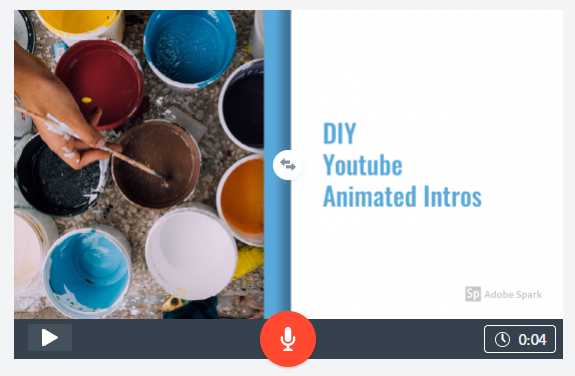
4. Creating an Intro with Adobe Spark
Note: These steps were completed on a laptop, but can also be completed in the Adobe Spark app, but the position of the buttons might be located in different places.
Step 1. Navigate to Adobe Spark. Note: You will need to create and account or sign in.
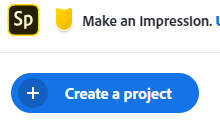
Step 2. Select the blue button to create a new project.
Step 3. Select the Video project type.
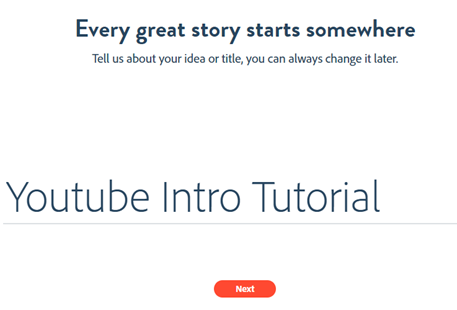
Step 4. Add a title to the project and click next. This can always be changed later if you don't like it.
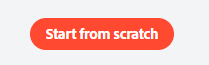
Step 5. Now you can select a template or start from scratch. For this tutorial, we are selecting to start from scratch.
Step 6. Click the plus sign in the middle of the slide and choose text.
Step 7. Enter your episode or show title.
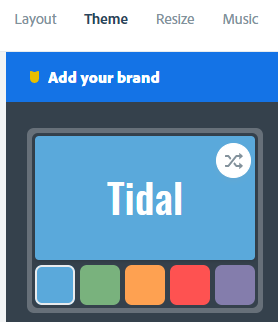
Step 8. Select theme from the upper right-hand corner. We are using the Tidal Theme. This theme will be applied to your entire intro. When you hover over each theme you can see the animations that will be applied to each slide.
Step 9. Select the plus sign next to the left of the current slide. This will create a new slide.

Step 10. Now go to layout and choose fullscreen.
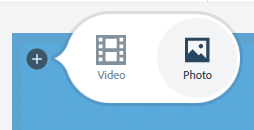
Step 11. Click on the plus icon in the top left-hand corner. Select photo. This will bring up a few photo options.
Step 12. From the photo options let's select find free photos. This brings up a search field that will allow you to find a free stock photo to use. For this tutorial, we will search for the word paint.
Step 13. Scroll through the images and select one to add to your slide.
Step 14. Select the plus icon in the center of the slide and choose text.
Step 15. Add some text that describes your channel or your video episode.
Step 16. Let's create a new slide by selecting the plus sign to the left of your slide.
Step 17. Select split-screen for the layout of your new slide.
Step 18. Select the plus icon in the upper left side of the slide and choose photo.
Step 19. Choose a new photo from the free photos search for this half of the slide.
Step 20. Now select the plus icon on the right side of the slide and choose text.
Step 21. Enter more text for your intro.
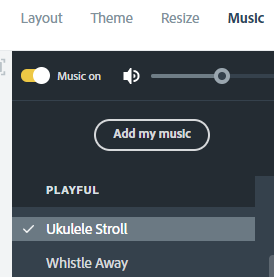
Step 22. Select the preview button to see how it turned out. This will also allow you to hear the music currently used in the intro.
Step 23. Optional step. If you want to change the music, then select the music tab in the upper right hand corner. This will give you a list of options you can use. We chose Ukulele Stroll under the Playful playlist.
Step 24. Continue to add slides until you're done and hit the download button when you're finished. You now how your YouTube intro.
5. Create an Intro Using Offeo
Note: This is a free intro maker, but it will require you to create an account to finish creating.
Step 1. Navigate to Offeo
Step 2.Click on the Make your intro for free button.
Step 3. Choose one of the intro templates available. We selected the elegant flame logo intro.
Step 4. The next step will allow you to preview the animation. You can use your browsers back button if you don't like the animation or you can select create if you are ready to go to the next step.
Step 5. This step will require you to sign in or sign up for a free account.
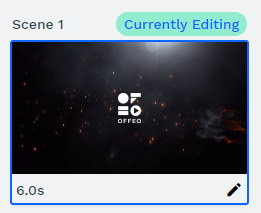
Step 6. The storyboard displays. Select the pencil icon in the first slide box.
Step 7. On the right hand side are all the layers. Select the eye icon on the logo layer to hide the logo.
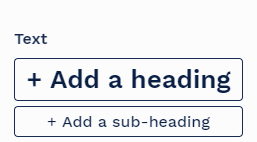
Step 8. Select the button on the left to add a heading.
Step 9. Double click on the text that was added to begin editing it.
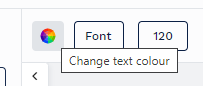
Step 10. Optional step if you are using a different template. Our background was dark so we had to change our font to white. We selected the color wheel and change it to white.
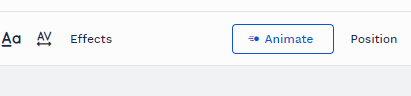
Step 11. Select the animate button to add an effect to your text.
Step 12. Choose which animation style you would like to use. For this tutorial we are selecting Zoom In. Near the top of the animation panel you can choose By Letter.
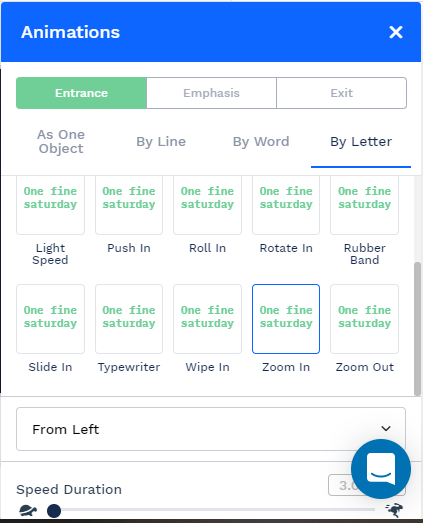
Step 13. Staying within the animations panel we also changed the direction and used the drop-down to select From Left.
Step 14. Next reduce the Speed Duration to the far left. This will help the letter animations to be more pronounced.
Step 15. Now close the animations window using the white x in the top right of the panel.
Step 16. Select the play all button to review your intro. If you like it just hit download and your all set.
At this point, you can use this intro or you can also select the storyboard button to go back and add another scene to your introduction.
We hope you enjoyed these 5 free Youtube intro animation tutorials.
Keep Reading:
How To Create An Animated Youtube Intro
Source: https://filtergrade.com/5-tutorials-making-animated-youtube-intros/
Posted by: kingassfor.blogspot.com
0 Response to "How To Create An Animated Youtube Intro"
Post a Comment